Carve a Bellamy Eagle - Part III The Head
- William Francis Brown

- Jan 16, 2021
- 13 min read
Updated: Jan 21, 2021

Before we get started, I just want to mention some ideas I have for upcoming posts in this series. I'm planning to cover all aspects of the eagle carving including finishing, gold-leaf gilding, painting, banners, back treatment, top coats, mounting, etc. Also I will discuss my carving set-up, some short-cuts & tips, sharpening, and some wonderful jigs I've developed. I think folks will especially enjoy my sharpening method - I've tried it all over a lifetime of woodworking and carving. My method is somewhat unique but incredibly fast.
Also stay tuned as I develop my Store ( on this website and also on my Line and Berry furniture making and carving site) with unique sharpening supplies I have developed, carving sets at deep discounts, as well as many other helpful items. I'll be stocking this soon.
Lastly, I'll be teaching the carving of a Bellamy eagle in a 5 day class next year at the Maine Coast Workshop. In the meantime, I have some of the world's best carvers (and teachers) holding 3 day to 5 day classes in 2021 so sign up soon if you are interested. OK, enough of the business meeting, let's start carving.......

Today we'll look at the in's and out's of carving a Bellamy eagle head. Please note that I've developed my own take on this. When you get into carving you will also develop your own style. All eagles below are my carvings unless noted otherwise.
Late 19th century carver, John Haley Bellamy, of Kittery, Maine, really cranked out his eagles, selling as many as 75 per month. He worked fast and was kind of a minimalist in order to achieve maximum efficiency. He farmed out the painting to locals. His eagle heads were close to square. Since I've got the time (and am sort of a perfectionist, plus my livelihood does not depend on it!) I prefer to spend more time carving the head.
There is a certain dignified look one wants to achieve - not too angry but rather serious and emblematic of the independence & freedom that it symbolizes. This stuff is obviously a matter of taste, so (as always) I'll just share what works for me.
I have come up with a few different styles, based on Bellamy and also on the great eagle carver (now retired) from Sandwich, Mass., Paul White......
This (below) would be the most common head style I carve. The tongue is optional but I usually include one. I almost always have the eye looking up, on the alert, as if the eagle is ready to go on the attack if necessary....

Below is another style based on that of Paul White. The eye is totally different here, but it works well. The slant of the brow determines how angry the eagle looks (just like humans). This one looks pretty amiable; more inquisitive than determined or angry. It's all rather subtle when it comes to the head. This can be the most challenging aspect for beginners......

There certainly are many variations, such as this streamlined and simplified head......

Or this head which was for a client that wanted a precise reproduction of a family heirloom. But even here there is a lot of similarity to the Bellamy (and my) style....

Here's a variation that I use occasionally. Note the curved neck. The tongue and eye can be painted red or gilded.....

By way of contrast, here's an original Bellamy. A little hard to see, but the beak has almost square edges....

You can see the square edges a little better here......

I'll also alter things a bit when necessary. For example, there's a confined space in this eagle (below) between the wings. I made the head especially narrow in order to fit between the two wings. It was important to have empty space and not crowd things too much. I also sometimes add a sort of starburst pattern around the neck-head junction, as seen here. I think it's a nice effect.........

Here's an example of what I would avoid (just my opinion; you might like it). I can hear my mother now: "keep it positive Bill" (Philippians 4:8).
This was made by the famous (& talented!) 18th century furniture maker Samuel McIntire of Salem, Mass. He was a maker of Federal furniture par excellence, but perhaps not so adept at carving eagle's heads.....

OK, let's start carving.
Make the head from a separate piece of wood. Basswood tends to hold sharp details a little better than pine, and it's fine to use it for the head and pine for the rest of the eagle. That said, I have drifted over the years to using pine for most of my carvings. Pine just carves like butter. Try to avoid knots on the face. I carve right through knots on the wings and with natural eagles (not gold-leafed) customers often seem to like that aspect. Obviously with gilded eagles it will all be covered up. Depending on the overall size of the eagle, use a 1 to 3 inch thick chunk of wood for the head. 1 inch for less than 12 inch wing span; 1 1/2 to 2 inch for up to 18 inch or so; and 2 1/2 to 3 inch thick for over 2 foot wide eagles. The grain should run right-to-left and remember that the piece will be glued and screwed to the body of the eagle later, so the back needs to be flat.
I don't use any fancy carving vises, work tables, etc.


Here are all of the eagle parts after cutting out on the bandsaw. A little hard to see, but I undercut the back of the head with a little taper toward the beak. This lifts the head up and off of the body of the eagle. I also taper the top surface a little toward the beak. The end of the beak is about 3/4 inch thick......

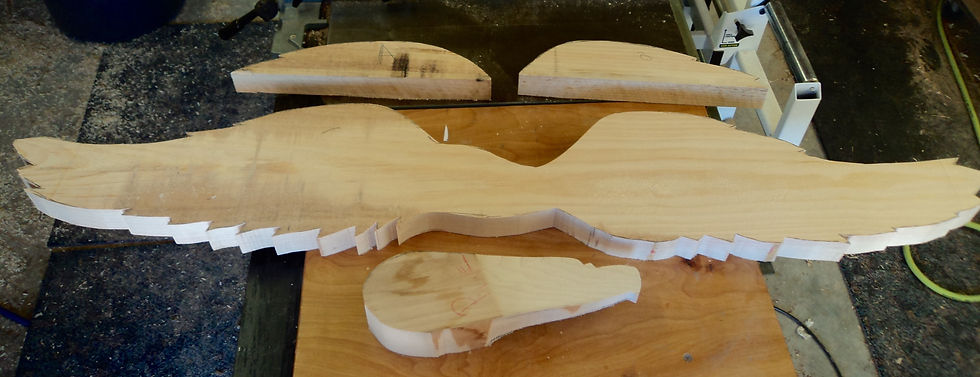
Note the flat on the body where the head will be attached. The head is blended into the body after final attachment.

Finally ready to carve!

Don't get hung up on your tools. I've seen amazing work by carvers using a pocket knife and not so wonderful work from folks who have 50 or more carving tools. A selection of 5-6 tools between 8-16 mm wide with # 2,3,5 curves is more than enough. The Phiel designation for these would be: 8/3 for example (see chart below). This means the tool's cutting edge is 8 mm wide and has a number 3 curve, which is a fairly mild amount of curvature. Number 1 is straight just like a bench chisel (although carving tools may have a knife edge). Higher numbers equal more curvature up to a #11 which is a really tight "U" curve.
The other tool which is key is a "V" tool. I like a 60 degree angle (number 12) for outlining feathers and defining the mouth, eyes, etc. Phiel tools are expensive. They use good quality metal. I am recommending Schaaf tools which are very similar to Phiel and other top brands for much less cost. I have sets available for student use at our Maine Coast Workshop classes and will have these available for sale, possibly at discount off the already low prices, at my Store on this website and at my shop.

Here's the carving tool size and numbering chart. Apologies it's a bit blurry......
I do not have photos of this next step. I will need to take more photos next time I make a head, which will be soon (I have an "In God We Trust" eagle to carve for a lady in Nantucket starting soon). I'll do a catch- up and post the pics of my set-up on the next blog post hopefully.
I clamp the head in a Harbour Freight heavy duty vise mounted on an iron girder. Round the head over with a drawknife. You can also use wide carving tools for this or a grinder with power carving attachments. But I find a draw knife makes quick work of this and is much less noisy and messy. I almost always have music going in my shop so I have the benefit of actually hearing it whilst I work.....

This is the iron girder which weighs a ton. Pictured here is the body but I'll also clamp the head in to hold it for rounding. This set up allows me to get around the entire piece without having a bench or anything else in the way. I can rotate or tilt the piece in any direction. I mounted wheels on it (on the back side here) but now I am using a dolly now to move it around. I used this to rive chair spindles with this set up when I had a windsor chair business. I have found that my old windsor chair tools are great for roughing out my carvings. BTW, we'll have a windsor class next year at the Maine Coast Workshop, so I guess I'll be using them again for their original purpose.
OK, Music break.
Recently discovered this contemporary Russian composer......
I though this was a wonderful discovery.
Nest, we'll round the beak over. Use carving tools for this (a spokeshave would work too): a wide number 1 straight (chisels work fine) or a wide No.2 and then refine and smooth the beak with files: Nicholson 49 or 50. I love the Shinto Rasp which makes quick work of smoothing over the carving marks. This can be followed up with the Nicholson 50 and/or 80 grit sandpaper. No need to get too refined at this stage though. We'll do most of the sanding later.
I'll post some pics of these steps also when I make my next head.

Here's an idea of the face pattern.
Note: I'll have patterns for sale for my eagles soon as I set up the Store at both my Maine Coast Workshop website and my Line and Berry furniture and carving website.
I draw out the features, focusing on the beak shape, mouth opening and eye. The eye position is kind of tricky. I am showing a picture of the mouth after it is cut out so that you can get a better idea of the relative positions of the eye to the final mouth opening. Note that a vertical line at the rear of the eye would roughly align with the back point of the mouth. It can be a bit further back as well. The portion above and in front of the eye will be lowered a lot, so the eye sits down lower on the face than you might imagine. See how the bottom of the eye is at the level of the top of the open mouth.
Don't let the paralysis of analysis set in too badly (I know all about this BTW). If you mess up, things can often be fixed and no one would notice when all is said and done. These eagles are highly stylized and allow for many variations. If you really need to start over, no worries, that's fine too.
Here's a completed head for comparison along with a head with features just penciled in. These heads were for my last order: a set of Bellamy "War & Peace" eagles (pictured below). These were almost 7 feet long. The War eagle faces rightward and the Peace eagle faces leftward. This holds for our American emblems, either on war ships facing right or on most everything else facing left.

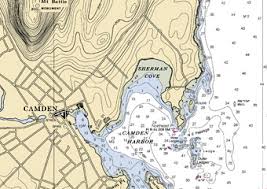
Here's the War& Peace eagles photographed with the new owner at the Windsor Chairmakers in Lincolnville, Maine (right up the road from my shop in Camden, Maine)......

Drill out the mouth. I use varying drill bit diameters to remove as much material as I can prior to cutting to shape with a hand scroll saw.


Here's what I removed with the power drill. Leave ample room for the tongue and be careful not to make the tongue too narrow or it could break. Since we were careful to align the grain direction east to west, the tongue holds up pretty well. We'll refine the tongue later with narrow carving tools, files, and sandpaper. I like to put a bit of curvature on my tongue. Bellamy typically made his straight. As I said, he was all about speed and mass production.

Now use a hand scroll saw, threading the blade through one of the holes. Scroll saw out the mouth, again being careful to leave enough meat on the tongue so it does not become too fragile.

Continue cutting out the mouth.
I often make a "V" shape on the roof of the mouth. Creates a subtly fierce look.

Adjust in the vise if you need to. The tongue can attach to the front of the beak or it can end before the beak. The former allows more support for the tongue. Both look good IMO.

You can see how much work is done before we really even start carving. This is like most creative work, be it painting a room or making furniture: 50% of the work is preparation: masking off, making templates, milling wood, roughing out the basic shapes, gluing up layers, or what have you.
Here, I've used my V-tool to start making the crease of the mouth. Shape the tongue in the process. You can see the v-tool shape on the top and bottom of the tongue at the back of the mouth. I have also started shaping the middle and end of the tongue as well. It's a process of rounding over and setting it deep inside the beak. I have also rounded some under the lower edge (jaw).

I like to make an elevated rim around the lower edge of the upper beak. None of this represents an actual eagle; it's all stuff used strictly for folk style carvings. That said, even if fictional, it's a nice detail I think. Not necessary to do this, as the eagle will still look good without it.

Using a V-Tool, carefully make a groove. Tilt the tool so that the outer/upper wing of the tool is almost flat on the upper surface of the head away from the open mouth. The other wing of the tool will make a more vertical cut on the top edge of the raised lip. This "lip" can be quite fragile and will want to chip out where the grain is running directly right-to-left on the edge of the mouth. I'll show you how I reinforce this next.

I'll squirt some cyanoacrylate (superglue) on that fragile lip when needed to prevent it from falling apart in areas where the grain direction warrants it. This soaks into the wood and stabilises it.
Next, lower the surface with a number 2 or 3 gouge so that the "lip" stands proud.


Cut a groove to form the overhang at the top of the beak. The area on top forms a "hood". Then flatten and blend the area under it with a number 2. This is a basic process that you will repeat over and over in all of your carving:
ie: V-tool to create the line of demarcation, then lowering of one surface. It's how we created the feathers in the prior blog post.
Cut a groove for the eye socket with a V-tool. I do like a steeper angled #12 V-tool for this. It's a 60 degree "V". Then start rounding the eye with whatever works: a small #3 or #5 or just a straight chisel. I like "fishtails" which are flared out at the end. As a general rule of thumb, I almost always prefer some curve in my carving tools. Even when making a "flat" surface, I'll use a number 2 or 3. It would be comparable to having a wee bit of camber in a plane blade in order to prevent gouge lines from digging in. Also, any flat surface always looks better with subtle, gentle undulations. This hold for my furniture where a hand planed surface reflects light in more interesting ways and is one more way that it sets it apart from a factory made piece. If I have a large flat surface on a carved whale for example that just looks too smooth, I'll grab a #3 wide tool and "rough it up" and it always looks much improved to me.........

Here's a 28 inch gilded whale I made for sale at the Windsor Chairmaker showroom
But we digress again.
Repeat this slowly over and over: going deeper with the V-tool and then rounding some more, going deeper into the eye socket each time. Take care to preserve the outer rim and make the cuts toward the eye itself so as not to widen the eye past the initial V cut.


Progress.
Don't worry if it looks nothing like an eagle at this stage. It will take on the form as we continue. Note that I've penciled in an area toward the front of the eye. This will be removed and blended with the surrounding part of the "shield" in front of the eye.

I'm going to backtrack a little. You can see that the top of the head has been shaped with a nice curve that swings down to the "hood". You need to slice that out with chisels and then smooth things with files. Lastly, sand it all to get everything to blend nicely.
I did not take photos of this process either. Will do that and post later. Keep the line at the bottom of the curved forehead sharp and sloping right to the front of the eye. Hope this makes some sense. Notice how, from the top of the head, everything slopes downward toward the eye in a gentle curve. This creates the heavy brow which gives the expression a lot of character.
The lip should be gently sanded to round it somewhat. The tongue has been sanded as well. I use thin files & fold sandpaper slipped into the mouth to get the inside and surface of the tongue. Not to worry too much about perfect smoothness here.
Sanding the eye socket goes a long way to blending everything nicely.
Hollow out an area under the eye. This lends some texture and character to the face. I use an 11/7 or 11/10 (see chart above) which has a significant curve to create the groove. It will look too sharp, but again, after some sanding with 80 grit, it will blend nicely with the rest of the face.
Also note that the area in front of the eye has also been scooped with another steeply curved gouge to create the "teardrop area". Again, blend everything with sandpaper. The photo above shows how it will look after this blending.


Once again, use the V-tool to delineate the large scapular wing on the back of the eagle. Follow the curve of the eye brown so the line flows directly into the lower wing edge. Then use a #2 to lower the surface to create the wing overhang....you know the drill: V-tool then lower the surface.

You should have something like this now.....

Congratulations, this is the toughest aspect of any eagle. And just keep in mind that everything gets easier with repetition. I still have a bit of insecurity when I carve an eagle head. I've penciled in some feathers and you can see how the eye pupil really transforms the entire face. I usually wait til last to cut out the pupil, with a #11 as it's easy and much fun to watch the head come to life!
We'll pick up on the feathers for the head and the blending with the body next time.
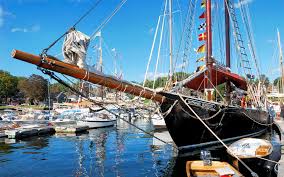
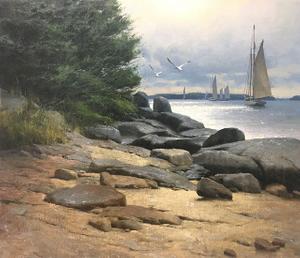
Don't forget to subscribe to updates. And please consider taking a class at my new school. I welcome beginners. The camaraderie of an in-person class is really unique and fun. You will learn more in a few days than you could in a year or more on your own. And Camden is just an amazing vacation destination. I attached some photos of the area below as well as a few shop pics. We'll have a close circuit camera and large screen so students who prefer can watch the instructor do demos right from their benches.
Til next time, thanks for checking in. Would love to hear from anyone who's carving one of these. I'm happy to answer questions or help any way I can.
--Bill
Isaiah 40:31


Comments